This post may contain affiliate links or ads and we may earn a small commission when you click on the links at no additional cost to you. As an Amazon Affiliate, we earn from qualifying purchases. This is at no additional cost to you and helps with our website expenses.
So, you want to know how to set up a home painting studio? Great! Whether you’ve got a tiny corner or a whole room to spare, it’s doable.
Contrary to popular belief, setting up a home painting studio doesn’t require a vast, light-filled space. Even a small, cozy nook can turn into a magical art haven. The trick is to work with what you’ve got.
A Palette of Possibilities
This guide isn’t just about the space, though. We’ll talk about the tools of the trade too. Be it oil, acrylic, or watercolor, each painting type has its own set of essentials. But don’t worry, we’re keeping it budget-friendly!
And for those of you who fear the mess, we’ve got you covered. We’ll share some foolproof tips to keep your studio organized. Because a clear workspace equals a clear mind, right?

Work with What You’ve Got to Set Up a Home Painting Studio
First things first, evaluate your available space. It might be a spare room, a garden shed, a basement corner, or a part of your bedroom. It doesn’t matter. What matters is how you transform it. Here’s how to go about it:
- Identify your space: Start by designating a specific area as your studio.
- Assess the light: Natural light is a painter’s best friend. But if that’s scarce, don’t sweat it. You can always get daylight bulbs or a good quality lamp.
- Check the sound: Is there hustle and bustle and noise? A more quiet area might be best.
For the Smaller Spaces
Now, if you’re working with a smaller area, be creative. Here are some tips:
- Use vertical space: Think shelves, pegboards, or hanging organizers. They are great space-savers!
- Multipurpose furniture: A desk that can store your supplies? Yes, please.
- Keep it tidy: It’s easy for a small space to feel crowded. So, make it a habit to clean up after each painting session.


For the Larger Spaces
Lucky you! With more room, you have more freedom. But remember, an efficient layout is key.
- Zone your studio: Have a separate area for painting, drying, storing supplies, and cleaning brushes.
- Invest in good storage: More space means more art supplies. And more supplies call for better organization.
- Don’t clutter: Just because you have space, doesn’t mean you need to fill it up. Keep it airy and inspiring.
The Art Kit Breakdown to Set Up a Home Painting Studio
When it comes to painting, your chosen medium can alter the game entirely. Acrylics, oils, watercolors, each brings a unique rhythm to the easel. And naturally, they each call for their own set of tools and supplies. So let’s dig into the art supply checklist for each one of them.
Acrylic Companions
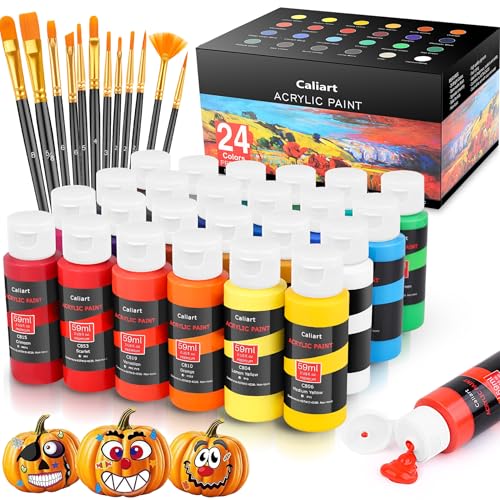
Acrylics are often the first love of many artists, and for good reasons. They’re versatile, easy on the pocket, and friendly to beginners. Here’s your basic acrylic gear:
- Acrylic Paints: A basic set is a good starting point.
- Brushes: Stock up on a variety of sizes and shapes.
- Palette: A simple plastic palette is enough.
- Canvas or Acrylic paper: Your pick entirely.
- Clean-up rag or paper towels: Because acrylics love to play dirty!
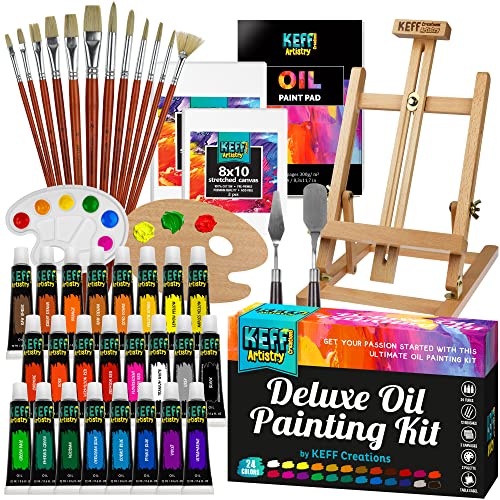
Oil Essentials
For those who revel in the richness of oils, patience is key. These paints might test your patience with their drying time, but the results are always rewarding. Your oil painting shopping list:
- Oil paints: Get started with a basic color palette.
- Brushes: Synthetic and hog bristle brushes are your allies.
- Palette Knife: For creating those beautiful color mixes.
- Palette: A wooden palette is a classic for oil paints.
- Canvas: Opt for pre-primed ones to save time.
- Solvent and oils: Necessary for thinning paint and brush cleaning.
Watercolor Necessities
Working with watercolors is akin to performing a beautiful, unpredictable symphony. Here’s what you’ll need to get started:
- Watercolor paints: A beginner’s set will suffice.
- Brushes: Both synthetic or natural hair brushes work well.
- Watercolor paper: Its thickness and absorbency are perfect for watercolors.
- Palette: For blending your watercolors into beautiful washes.
- Two water containers: Keeping clean water and rinse water separate is crucial.

Remember, it’s not about getting the most expensive supplies. Start small, understand what works for you, and expand as you go.
Budget-Friendly Equipment Essentials to Set Up a Home Painting Studio
Establishing a home painting studio is an exciting step for any budding artist. However, the initial setup can often seem intimidating, especially from a budget perspective. The good news is that it doesn’t have to be a costly endeavor.
With a few essential pieces of equipment, you can create an inviting space that fosters creativity without causing financial stress. Here’s the detailed lowdown on what you’ll need:
Easels
An easel is arguably the most iconic piece of equipment in any artist’s studio. It’s the silent partner to your creative process, providing the support your canvas needs as your artwork takes shape. Easels come in various sizes, designs, and materials.
For beginners working with a limited budget and space, a tabletop easel is a fantastic start. These compact easels are cost-effective, easy to store, and perfectly capable of holding smaller canvases.
As you delve deeper into your artistic journey, you might want to invest in a larger, more robust floor-standing easel, which offers greater stability and accommodates larger canvases.
Easels to consider:
- Tabletop easel: Compact and affordable.
- A-frame easel: Mid-range, collapsible, and sturdy.
- H-frame easel: Expensive but extremely durable and stable.
- Plein air easel: Ideal for outdoor painting.


Palettes
A palette is an essential tool for mixing your paints and managing your colors. It might seem like a simple tool, but the choice of palette can significantly impact your painting process.
Disposable palettes or palette paper are an economical choice for beginners. They provide a smooth surface for mixing paints, and once you’re done, you can simply throw them away—no cleaning necessary.
On the other hand, plastic palettes are slightly more expensive but are reusable with a quick wash after each painting session.
Palettes to choose from:
- Disposable palette: Economical and convenient.
- Plastic palette: Reusable and easy to clean.
- Glass palette: Slightly pricey, but excellent for mixing colors.
- Wooden palette: Traditional, though it needs regular cleaning.
Brushes
Brushes are the essential tools of the trade, the extensions of your creative hand. But that doesn’t mean you need a vast collection to start with. A basic set of brushes with a mix of sizes and shapes will get you started on most mediums.
Initially, you can get by with a handful of flat and round brushes. As you experiment more and understand your painting style better, you can expand your brush collection.
Brush types to begin with:
- Round brushes: For detailed work.
- Flat brushes: Perfect for bold, sweeping strokes.
- Filbert brushes: Good for blending.
- Fan brushes: Useful for creating textures.
Canvases or Paper You Need to Set Up a Home Painting Studio

The choice of surface or substrate you paint on can dramatically influence the final outcome of your work. Beginners can start with pre-primed canvas boards or acrylic paper, which are affordable and ready to use.
Watercolor artists will require the thicker, more absorbent watercolor paper. Oil painters might prefer canvas or specially designed oil paper.
Consider buying in bulk packs to save on cost, and don’t forget, the aim initially is to practice, so don’t worry too much about the quality of your canvas or paper.
Surface options to start with:
- Pre-primed canvas boards: Affordable and ready-to-use.
- Acrylic paper: Budget-friendly choice for acrylics.
- Watercolor paper: Essential for watercolor painting.
- Oil paper: Specially made for oil paints.
Paints
The quality of your paint plays a pivotal role in your artwork’s final appearance. It’s always recommended to start with a few tubes of high-quality paint rather than a large set of lower-quality ones.
You can look for student-grade paints from reputable brands. They’re a more budget-friendly alternative to professional-grade paints and deliver commendable results.
Start with primary colors plus black and white, and mix your colors initially. This practice will not only save money but also help you understand color theory.
Basic paint colors to start with:
- Cadmium Red
- Ultramarine Blue
- Cadmium Yellow
- Titanium White
- Ivory Black
Lighting when You Set Up a Home Painting Studio
The importance of good lighting in a painting studio cannot be overstressed. It is crucial for accurately seeing and representing colors.
Natural light is ideal, but if that’s not available, invest in a good-quality desk lamp equipped with daylight bulbs. These bulbs mimic natural light and provide a more accurate color representation than regular bulbs.
A clamp-on desk lamp is an affordable option that can be moved around as required, ensuring your workspace is well-lit no matter the time of day.
Lighting options to consider:
- Desk lamp with daylight bulb: Affordable and portable.
- Floor-standing lamp: Provides broader lighting coverage.
- Clamp-on lamp: Can be fixed at different angles.
- Adjustable spotlight: Allows focused lighting.
Creating a home painting studio is all about starting small, understanding what works for you, and gradually building up your equipment as your skills develop and your budget allows.
Setting Up for Different Types of Painting
Every artist’s process and style is unique, influenced heavily by the medium they work with. Acrylic, oil, and watercolor paintings each have specific needs when it comes to studio setup.
Let’s delve into how you can adapt your studio to suit each of these mediums.
How to Set Up a Home Painting Studio for Acrylics
Acrylic paints are versatile, quick-drying, and easy to clean, making them perfect for a beginner’s studio. As they dry fast, it’s essential to keep your paints moist.
A stay-wet palette could be a worthwhile investment to prevent your paints from drying out. Ensure your workspace is well-ventilated, as acrylics can sometimes give off fumes.
Setup essentials for acrylic painting:
- Stay-wet palette: Keeps paints workable for longer periods.
- Water container: For cleaning brushes and thinning paints.
- Quick access to cleaning materials: Acrylics dry fast and permanently.
- Well-ventilated area: To disperse minor fumes from acrylics.
How to Set Up a Home Painting Studio for Oil Paints
Oil paints require a bit more preparation and cleanup compared to acrylics. They have longer drying times, which allows for more blending and detail work but also necessitates a safe space where a wet painting can be left undisturbed.
Additionally, you’ll need a well-ventilated area since the solvents used with oil paints can produce fumes.
Setup essentials for oil painting:
- Covered palette or freezer: For preserving your mixed paints between sessions.
- Space for wet paintings: To allow for long drying times.
- Well-ventilated area: Due to the use of solvents and mediums.
- Two containers for solvents: One for cleaning brushes, the other for clean solvent.
Watercolor Setup for Your Home Painting Studio

Watercolor painting setups need to account for the fluid nature of the medium. Having a flat surface might lead to the colors flowing and blending more than desired. Hence, a slight angle to your easel or working area is beneficial.
Also, you’ll need easy access to water for both mixing with paints and cleaning your brushes.
Setup essentials for watercolor painting:
- Angled workspace: To control the flow of paint.
- Two water containers: One for clean water, one for rinsing.
- Absorbent materials: Like sponges or rags for blotting and water control.
- Quick access to drying space: Watercolor artworks need to be dried flat.
Setting up your studio is not a one-size-fits-all scenario. It’s about creating a space that facilitates your unique creative process and caters to your chosen medium’s specific needs.
Set Up a Home Painting Studio to Optimize Your Space: Small vs Large Studios
No matter the size of your studio, a well-organized workspace can enhance your painting experience. Let’s look at how you can optimize both small and large areas to fit your painting studio.
Small Studio Spaces
Small spaces may be compact, but with clever planning, they can turn into a cozy, inspiring painting studio. Here’s how you can maximize the potential of a limited area:
- Vertical Storage: Utilize the vertical space in your studio. Install wall shelves or hang a pegboard to store and display your art supplies. This approach keeps your supplies within reach while freeing up floor space.
- Foldable Furniture: Invest in foldable or multi-purpose furniture. A folding easel or a desk with storage compartments can serve multiple purposes and be tucked away when not in use.
- Lighting: Proper lighting is crucial. If your small space doesn’t have abundant natural light, use daylight bulbs to ensure accurate color representation.
- Organization: Keep your space tidy. Assign a specific place for each item, and make it a habit to clean up after each session.
Large Studio Spaces
Having a large area for your painting studio is a luxury, but it also requires careful planning to avoid it becoming cluttered or disorganized. Here’s how to optimize your spacious studio:
- Zoning: Divide your studio into different zones. Have separate areas for painting, drying, storage, and clean-up. This segregation maintains order and enhances your workflow.
- Storage Units: Use cabinets, shelving units, or drawers for your art supplies. A well-organized storage system makes it easier to locate your materials, saving time and reducing clutter.
- Workspace: Invest in a sturdy, spacious table for your painting and preparation work. Having ample workspace makes it easier to manage your materials and create art comfortably.
- Display Area: Use one part of your studio to display your artwork. Not only will this provide inspiration, but it also allows you to evaluate your work from a distance.


Regardless of the size of your studio, the key is to create a space that suits your working style, maximizes efficiency, and inspires creativity.
Organization Tips for a Productive Painting Studio
Keeping your painting studio organized is just as crucial as the art you create within it. A clutter-free and well-arranged space allows for better concentration, easy access to materials, and, ultimately, more enjoyable painting sessions.
Here are some handy tips to keep your studio in top shape:
1. Categorize Your Supplies
Group your art supplies based on their category. Keep all your brushes, paints, canvases, and other tools in separate containers or drawers. This arrangement makes it easy to find what you need quickly, saving you precious painting time.
2. Label Everything
Once your supplies are categorized, take it one step further by labeling each storage area. Whether you’re using drawers, bins, or shelves, having labels will make it even easier to locate your supplies.
3. Regular Cleanup
Make it a habit to clean up your workspace after each painting session. Wash your brushes, close your paint tubes, and put everything back in its designated place.
This practice will not only prolong the life of your supplies but also ensure your studio is always ready for your next burst of creativity.
4. Use Vertical Space
Don’t forget about the vertical space in your studio. Wall-mounted shelves, pegboards, or hanging organizers are excellent ways to store your supplies without taking up valuable floor space. This strategy is especially useful in smaller studios.
5. Keep Essentials Within Reach
Place the materials you use most often within easy reach of your workspace. This setup will prevent you from having to get up and disrupt your creative flow when you need a new brush or color.
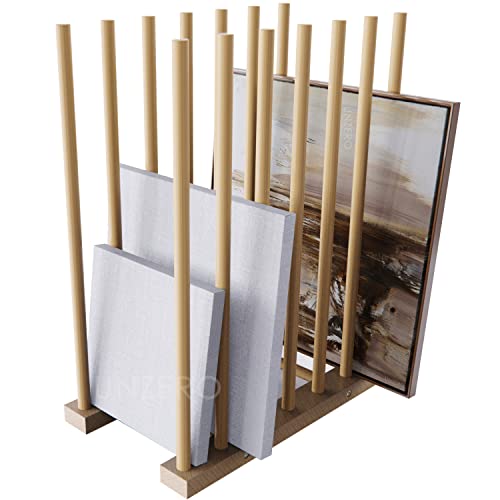
6. Have a Dedicated Drying Area
Having a specific spot for your paintings to dry is a great way to prevent accidental smudges or spills. If space is limited, consider investing in a drying rack that can safely hold multiple pieces at once.
7. Prioritize Lighting
Good lighting is crucial in any art studio. Ensure your workspace is well-lit, with either natural light or a quality artificial light source. Keeping your space bright will help you see your work more clearly and accurately.
Wrap up to How to Set Up a Home Painting Studio
Creating your home painting studio is a deeply personal endeavor, mirroring your artistic journey. It’s about setting up a space, irrespective of size, budget, or preferred paint type, that inspires and facilitates your artistic expression.
Remember, your studio should reflect your artistic persona and accommodate your creative needs. Whether you’re starting your painting journey or you’re already well along the path, the key is creating a space that feels uniquely yours.


